Understanding the Components and Installation of Kitchen Counter Handles
Kitchen counter handles are an indispensable component, providing both functionality and aesthetic appeal to your kitchen space. Understanding their components and installation process is crucial for a seamless and successful outcome. This article delves into the intricate details of kitchen counter handles, shedding light on their various aspects and guiding you through the installation process.
Types of Kitchen Counter Handles
Kitchen counter handles come in a diverse range of styles, materials, and finishes to complement different decor aesthetics. Choose from:
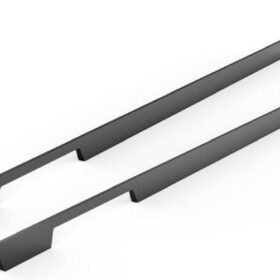
– Pulls: These are the most common type, installed on the cabinet’s face and requiring a pull to open.
– Knobs: Mounted on the cabinet door, knobs are more discreet and provide a single point of contact for opening.
– Cup Pulls: Similar to knobs but larger, cup pulls offer a more ergonomic grip for opening cabinet doors and drawers.
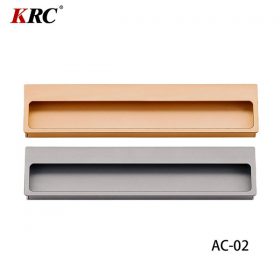
– Edge Pulls: Mounted on the edge of cabinet doors, edge pulls create a sleek and contemporary look.
Materials and Finishes
Counter handles are crafted from various materials, including:
– Metal: Durable and versatile, metal handles are available in finishes like stainless steel, brass, copper, and nickel.
– Wood: Natural and warm, wood handles bring a rustic or traditional touch to the kitchen.
– Ceramic: Delicate and decorative, ceramic handles add a unique character to your space.
– Glass: Modern and light, glass handles create a sense of sophistication and elegance.
Measurement and Installation Considerations
Before installing counter handles, it’s essential to take precise measurements:
– Hole Spacing: Determine the center-to-center distance between the mounting holes, which varies depending on the handle style.
– Handle Length: Choose a handle length that complements the size of your cabinets and allows for comfortable gripping.
– Height and Projection: Consider the height and projection of the handle to ensure it doesn’t interfere with other components, such as the countertop or appliances.
Installation Process
Installing counter handles is a straightforward process:
– Mark and Drill: Use a pencil and level to mark the hole locations and drill pilot holes.
– Insert Screws: Insert the mounting screws through the holes and tighten with a screwdriver.
– Secure Handle: Place the handle over the screws and secure it by tightening the screws further.
– Repeat: Repeat this process for all the remaining handles.
Maintenance and Cleaning
Proper maintenance ensures the longevity and aesthetics of counter handles:
– Regular Cleaning: Wipe down handles regularly with a damp cloth and mild detergent.
– Avoid Abrasives: Avoid using harsh cleaners or abrasive materials that can scratch or damage the finish.
– Tighten Loose Screws: Periodically check and tighten any loose screws to maintain the handles’ stability.
Conclusion
Understanding the components and installation of kitchen counter handles empowers homeowners and renovators to create a functional and stylish kitchen space. By selecting the right type, material, and finish, and following the proper installation process, you can enhance the aesthetics and functionality of your kitchen for years to come. Remember to consider measurement, maintenance, and cleaning to ensure the handles remain in impeccable condition.
-
2024-09-14Exploring the Different Types of Modern Closet Door Pulls and Their Applications
-
2024-09-14How Cabinet Door Pull Handles Support High-Traffic Areas
-
2024-09-06Cost-Benefit Analysis of Investing in High-Quality Long Wardrobe Door Handles
-
2024-09-04How Flat Cabinet Handles Enhance Modern Interior Design
-
2024-11-29Top Trends in Modern Kitchen Cabinet Pulls for 2024
-
2024-11-28The Ultimate Guide to Modern Kitchen Cabinet Pulls- Materials, Styles, and Tips
-
2024-11-27Elevate Your Kitchen Design with These Must-Have Modern Cabinet Pulls
-
2024-11-26Sleek and Stylish- The Best Modern Kitchen Cabinet Pulls for a Contemporary Look


