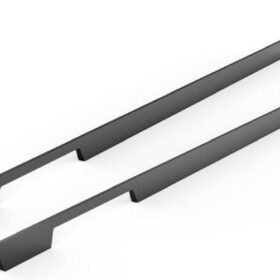
Best Practices for Installing Bedroom Wardrobe Handles Securely
Installing wardrobe handles securely is essential for ensuring their functionality and longevity. By following these best practices, you can avoid loose or damaged handles that can compromise the use and aesthetics of your wardrobe.
Determine Proper Handle Placement
The optimal placement for wardrobe handles depends on the size and design of the wardrobe. Generally, handles should be centered on the doors and at a height that is comfortable for the user. For tall wardrobes, consider installing two handles per door for better grip and access. Measuring the distance between the holes on the handle and marking the placement on the door with a pencil will ensure accurate positioning.
Use Appropriate Screws and Fixings
The type of screws and fixings used to install wardrobe handles is crucial for their security. Opt for screws that are the correct length and diameter for the thickness of the door and handle. Avoid using screws that are too short, as they may not provide sufficient support, or too long, as they can damage the door. Additionally, consider using washers to distribute the load and prevent the screws from sinking into the wood.
Pre-Drill Pilot Holes
Pre-drilling pilot holes before installing the screws ensures a clean and straight installation. Use a drill bit that is slightly smaller than the diameter of the screws. Drilling the pilot holes slightly deeper than the length of the screws allows for some wiggle room during installation. This precaution prevents the wood from splitting or cracking when the screws are driven in.
Tighten Screws Securely
Properly tightening the screws is essential for ensuring a secure installation. Use a screwdriver or drill with an appropriate bit and tighten the screws firmly. Avoid overtightening, as this can strip the screw heads or damage the wood. If the handle feels loose after tightening, remove the screws, apply a small amount of wood glue to the threads, and reinstall them securely.
Check for Alignment and Adjust
Once the screws are tightened, check the alignment of the handles. Both handles on the same door should be at the same height and parallel to each other. If any adjustments are needed, loosen the screws slightly and reposition the handle as necessary. Repeat the tightening process until the handles are properly aligned.
Inspect Regularly and Maintain
Over time, wardrobe handles may become loose due to wear and tear. Regular inspections can help identify and address any potential issues early on. Check the screws for tightness and, if necessary, tighten them using a screwdriver. Additionally, cleaning the handles with a damp cloth and mild soap solution can help remove dirt or grime that may interfere with their movement.
-
2024-11-29Top Trends in Modern Kitchen Cabinet Pulls for 2024
-
2024-11-28The Ultimate Guide to Modern Kitchen Cabinet Pulls- Materials, Styles, and Tips
-
2024-11-27Elevate Your Kitchen Design with These Must-Have Modern Cabinet Pulls
-
2024-11-26Sleek and Stylish- The Best Modern Kitchen Cabinet Pulls for a Contemporary Look


