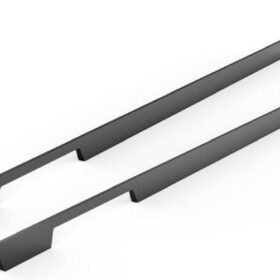
A Beginner’s Guide to Installing Cabinet Finger Pull Handles
A Beginner’s Guide to Installing Cabinet Finger Pull Handles
For home improvement enthusiasts and DIYers, upgrading cabinet handles is an accessible and rewarding project. Finger pull handles, with their sleek and modern design, offer a practical and stylish addition to any cabinet. Here’s a comprehensive guide to help you install finger pull handles with ease.
Preparation
Before you begin, gather the necessary tools, including a drill, screwdriver, measuring tape, and level. Determine the ideal location for the handles and mark the spots accordingly. Ensure that the handles are evenly spaced and aligned with other hardware on the cabinets.
Drilling Pilot Holes
Use a drill with a bit that matches the diameter of the screw provided with the handles. Drill a pilot hole at each marked location, creating a small guide for the screws. Make sure the holes are perpendicular to the cabinet surface and slightly shallower than the length of the screws.
Inserting the Screws
Insert the screws into the pilot holes and tighten them using a screwdriver. Avoid overtightening, as this can damage the handles or the cabinet. Tighten the screws until they are firmly in place, but allow for a slight gap between the handle and the cabinet surface to prevent scratching.
Aligning and Leveling
Once the screws are inserted, align the handles and adjust their position as needed. Use a level to ensure that they are horizontally aligned and level. Make any necessary adjustments to the screws to achieve the desired orientation.
Tightening and Finishing
Once the handles are aligned and leveled, fully tighten the screws to secure them permanently. Use a cloth or soft cloth to remove any sawdust or debris from the handles. Apply a small amount of wax or polish to the handles to enhance their appearance and protect against wear.
Additional Tips
Use a countersink bit to slightly countersink the screw heads, creating a flush finish.
If the handles have a separate base plate, attach the base plate to the cabinet surface first before installing the handles.
For heavy-duty handles, consider using longer screws or adding support underneath the cabinet to prevent sagging.
If you encounter any difficulties during the installation, don’t hesitate to consult a professional for assistance.
By following these steps and considering these additional tips, you can successfully install finger pull handles on your cabinets, enhancing their functionality and aesthetic appeal.
-
2024-11-29Top Trends in Modern Kitchen Cabinet Pulls for 2024
-
2024-11-28The Ultimate Guide to Modern Kitchen Cabinet Pulls- Materials, Styles, and Tips
-
2024-11-27Elevate Your Kitchen Design with These Must-Have Modern Cabinet Pulls
-
2024-11-26Sleek and Stylish- The Best Modern Kitchen Cabinet Pulls for a Contemporary Look


